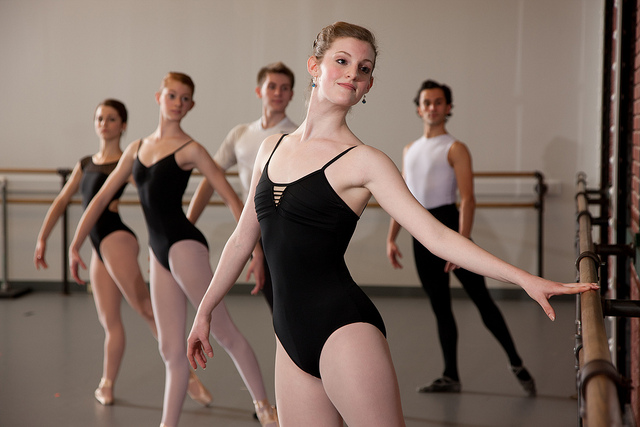
During dance class, a student must be able to quickly learn ballet combinations and then perform these exercises almost simultaneously. Dance Advantage has already given you tips for remembering choreography and published how one teacher helps his students pick up combinations. The strategy outlined below by teacher and ballet blogger, Carla Escoda, walks you through memorizing a dance combination (specifically, ballet) step by step. If you adopt it, no combination should be too challenging.
Photography by Brett Pruitt & East Market Studios
Learn the pathway first.
Memorize the direction of travel, how many steps you need to take in each direction, and the changes in direction, before you focus on the actual steps.
This is a critical survival technique when moving across the floor: if you blank out on the details, you should be able to walk across the floor in time to the music, covering the same amount of ground as the dancers around you. This is the way to avoid looking like you are completely out to lunch, and to avoid creating a traffic pile-up.
Knowing how many steps to take in each direction is the first priority.
Successfully negotiating the pathway also requires spatial awareness: at its most fundamental, spatial awareness while moving means understanding what size steps you’re expected to take. Ballet is a very specific language: you’re either meant to take a small step, keeping your feet essentially underneath your centre of gravity, or you’re propelling yourself over a large distance, or something in between.
Ballet combinations are frequently choreographed along a diagonal line (thank Louis XIV for this innovation.) Manage your diagonals scrupulously – there are few things more dangerous in ballet class than a dancer barreling drunkenly down a diagonal, over-crossing the feet, or lunging sideways. Try to imagine a line painted along the diagonal and keep your feet moving on that line.
Note the body facing.
Ballet dancers are famous for traveling in one direction while their hips, shoulders and heads are facing another direction. (This must be why ballet dancers are such bad drivers!) Once you’ve established the pathway, note whether your hips and shoulders are supposed to face the direction you’re traveling in, or spiraled against that direction.
If the combination doesn’t travel (as in adagio, or at the barre), the key body facings to note are croisé, écarté and effacé.
Consult Gail Grant’s Technical Manual and Dictionary of Classical Ballet
Group steps together.
Most combinations lend themselves to grouping. Memorizing the steps within a set musical phrase, say, eight counts, is the most obvious way of grouping. But it sometimes makes more sense to group steps by direction of travel, or all the steps leading up to a pirouette, or a big jump.
When you group steps together, it is easier to recognize patterns. Ballet is a very symmetrical, pattern-based discipline: groups of steps often repeat, sometimes with a change of body facing, or some other small variation. We often do a short sequence to the right then the same sequence immediately to the left, or forward then in reverse. When you recognize a pattern that repeats, you save yourself a lot of memorization work. One of the most common patterns at the barre is en croix: the same sequence of movements executed to the front, to the side, to the back, and to the side again. You only have to memorize the sequence in one direction.
Ballet dancers make excellent mathematicians, computer scientists, statisticians and all kinds of scientists who have to grapple with mountains of data, because they’re good at “chunking” – a cognitive process that allows us to hack the confines of our working memory. It’s a way of compressing information by separating it into “chunks” that are easier to remember and store than the individual bits of data.
Memorize one group of steps at a time – marking it several times over and over – before moving on to the next group of steps; this is the most effective way to imprint a long combination in the brain.
A form of grouping that works for some dancers: memorize the combination in pairs of steps, asking yourself “what comes immediately after the ____?” It’s a way of simplifying the task, by tricking the mind into thinking of only two steps at a time. Try to remember that the glissade leads to a jeté. That the jeté leads to a pas de bourrée. That the pas de bourée finishes with a brisé. Some people’s minds naturally embrace this paired approach. (Other people just think this is nutty.)
Identify the “landmark” movements.
Every combination has them: a grand battement; a big jump; a turn; a promenade; a developpé or piqué into a balance; etc. Sequence the landmarks in your mind, before worrying about the intermediate or transition steps.
Students are easily overwhelmed when confronted with a 32-count combination, thinking that there are 32 steps they have to memorize. In reality, there may be only two or three landmarks in that combination, and if you have those down – say, an inside turn, followed by a piqué arabesque and finishing with an assemblé – you could get through the whole combination respectably by remembering the timing of those three movements, and just walking through the intermediate counts.
Memorize which foot you start off each section of the choreography, and which foot you use to take off for the “landmark” movements. And know whether to finish a sequence with the leading foot closing in front or back.
Don’t think right or left foot, because you will have to rethink everything when you start the combination to the other side; instead, remember whether you start off on the downstage or upstage foot (that is, the foot closer to the audience or farther from the audience.)
At the barre, think in terms of the “outside” foot (away from the barre) and “inside” foot (closer to the barre.) Most beginning classes work the outside foot exclusively, but occasionally you switch to the inside foot.
Whether you actually count the steps or not, listen to the music, listen for the downbeats and the beats on which the landmark steps occur.
Is there a big jump on count 8? A pirouette on count 4? A 6-count promenade in the middle?
If counting just confuses you, that’s fine, you just need to find a way to mark the beats to yourself – either by walking in time to the music, or making sounds in time to the music. Many teachers find counting unnatural and have a way of ‘singing’ or sounding out the rhythm, like a scat.
Some students try to learn the steps independently of the music. They assume that matching the steps to the music is a lower priority than getting the steps right. This is dead wrong! From an observer’s point of view, it is painful to watch even the most virtuosic dancer if he is not on the music. To a dancer, music should drive movement: if you listen, the music will “tell” you when to move. Focus on moving in time to the music and along the correct pathway. After that, you can worry about executing the steps correctly.
Mark the combination as you’re learning it; don’t just stand still and try to take it in mentally. Imprinting happens much faster if you are moving.
“Marking” means walking through a combination, not dancing full out, but taking small steps along the pathway in time to the music. Similarly, at the barre, you don’t do the combination full out, but you move the legs and arms in the right directions.
Most dancers when marking don’t actually execute pirouettes, since that takes their gaze off the teacher; instead they learn to “signal” a pirouette, usually with a hand gesture or with a spiraling of the shoulders in the direction of the turn, or they balance in the pirouette position without turning. Similarly, they turn big jumps into tiny jumps when marking.
There is an etiquette to marking: don’t get in other people’s way, and do “shrink” the movements so that you don’t distract others as they’re trying to learn the combination, too.
Make sure you note whether a turn or pivot is en dehors or en dedans.
Turns and pivots within combinations are the moments when things are most likely to go to hell in a handbasket. Turns and pivots alter your body facing, so even dancers who are naturally good turners can easily mess up a combination by mistaking the kind of turn.
First, you have to know which leg you’re supposed to turn on. This is not a trivial point! No matter how advanced a student you are, chances are you’ve found yourself standing on the wrong leg many times. Try not to think in terms of right or left leg; instead, figure out whether you’re supposed to be turning on the downstage leg (closest to the audience) or upstage leg.
Once you know which leg you will be turning on, get used to thinking in terms of en dehors and en dedans rather than turning to the left or right. En dehors are ‘outside’ turns, turning AWAY from the standing leg. En dedans are ‘inside’ turns, turning in the direction of, or TOWARD the standing leg. Their execution feels very different physically, so it’s important to try and get the distinction between these two into your muscle memory.
A pivot is a turn of less than 360 degrees. They’re mostly done on one leg (most of ballet is done on one leg, as you’ve probably figured out by now!) en dehors and en dedans, too.
Master your basic geometry: are you supposed to be turning 45 degrees, or 90 degrees, or 180 degrees? Does that leave you facing a corner, or a wall, or the mirror after the pivot?
For example: if you’re standing on your right leg facing the mirror squarely, an en dedans pivot of 90 degrees will end up with your body facing the right wall, i.e., you will be turning to your right. An en dehors pivot of 90 degrees will end up with your body facing the left wall, i.e., you will be turning to your left.
When all else fails, pick the right person to follow!
It’s amazing how often common sense flies out the window when terrorized by a speedy allegro combination.
Do not try to follow someone behind you – even if she is the best dancer in class and knows what she is doing – unless you can see her in the mirror without having to turn your head to look.
It is never a good idea to follow the teacher, except when she is first teaching the combination. Once you go live, the teacher may demonstrate part of the combination but her primary responsibility is to watch the group and give corrections, so she may suddenly stop demonstrating and move to avert a crisis somewhere in the room.
The best practice is to watch yourself in the mirror. You will be able to see others in your peripheral vision and will know whether you are in sync with them or not. Inexperienced dancers resist looking at themselves in the mirror; all they see are faults. But it is very difficult to learn without that visual feedback. Looking down at the floor or at a wall gives you no information, and you also risk losing your balance or crashing into someone.
What if you are in the back row and can’t see yourself in the mirror? Or are taking class in a studio without mirrors? Or what if the teacher is in a bad mood and says “OK everyone turn around and face the back wall and do the combination without admiring yourselves in the mirror”? Keep your head up and watch the dancers in front of you.
Following one person directly in front of you and not looking at anyone else is not the best strategy, either. If that person makes a mistake, you are sunk. So it’s best to hedge your bets and allow yourself the widest field of vision, giving yourself more than one peer to follow.
So what about those pesky transition steps?
You’ll notice I haven’t mentioned all the in-between steps. Experienced dancers have archived into muscle memory the options that generally precede a grand jeté, the various preparations and landings from pirouette, and so on, so their minds don’t have to work so hard.
To get to that level of proficiency, you have to recognize and practice the most common transition steps. It helps to practice glissade, pas de bourrée, tombé, chassé, chassé coupé, temps lié, contretemps, and the ballet walk (toe-ball-heel) over and over so they become second nature.
Breathe! And simplify…
Sometimes the biggest impediment to executing a combination in class is panic. This can stem from a feeling of incompetence when confronted with steps that are genuinely challenging for you at your level, or a tempo that is too fast for your comfort level. Panic is not helpful, however, because it usually makes you hold your breath, and starving the brain of oxygen just makes you even more incompetent.
But what if the individual steps themselves are too difficult for you?
Remember that you can simplify jumps and turns.
You can take beats out of jumps: an entrechat quatre can be turned into a soubresaut (a jump with no change in the feet), a royale into a changement, a jeté battu into a plain jeté, a cabriole into a temps levé without a beat, etc. Multiple pirouettes can be turned into singles, or even into balances without a turn. A very fast series of jumps or turns can be cut in half: 4 fast chainé turns can morph into 2 turns at half the speed; 8 zippy changements can become 4 at half the speed; etc.
What is most important is to finish the sequence in the correct way: landing with the correct foot in front, and facing the right direction.
You can also simplify the arms.
At the barre, keeping your outside hand on your hip, or holding the arm in 2nd throughout the combination is usually fine. In the centre, holding the arms in 2nd and lowering them for petit allegro is an acceptable default.
Hands on hips don’t work as well in the centre because the arms are then not available to help you balance; ballet arms function like outriggers, they’re not just slicing through the air for purely decorative reasons.
Hands on shoulders are a great simplifying discipline for turns: they help keep your back upright and remove the complication of having to coordinate arms during pirouette combinations.
Reading this, you may think: “but my teacher would never allow all these modifications!” In which case, don’t be afraid to ask her for her own simplification.
Carla Escoda trained as a ballet and modern dancer at Ballet Philippines in Manila, with the Connecticut Ballet, and at Yale University, where she performed with the Yaledancers and received her B.S. and M.S. in Engineering & Applied Science with a double major in French Literature. She resumed the practice of ballet after a hiatus of 20 years, as a form of physical therapy following the onset of a severe case of arthritis. Carla is an American Ballet Theatre ABT® Certified Teacher, who has successfully completed the ABT® Teacher Training Intensive in Primary through Level 7 and Partnering of the ABT® National Training Curriculum. She teaches in San Francisco and Marin, California and blogs at Ballet To The People.
 Carla Escoda trained as a ballet and modern dancer at Ballet Philippines in Manila, with the Connecticut Ballet, and at Yale University, where she performed with the Yaledancers and received her B.S. and M.S. in Engineering & Applied Science with a double major in French Literature. She resumed the practice of ballet after a hiatus of 20 years, as a form of physical therapy following the onset of a severe case of arthritis. Carla is an American Ballet Theatre ABT® Certified Teacher, who has successfully completed the ABT® Teacher Training Intensive in Primary through Level 7 and Partnering of the ABT® National Training Curriculum. She teaches in San Francisco and Marin, California and blogs at


